Tuesday, October 05, 2010


How about a Gorjuss start to today?
Don't groan at the pun, it's as good as you get from me on a morning before 10, lol.
This Gorjuss stamp now retailed by PI is "Sent with Love" and has been coloured using my copics pens, white gel pen and a wee bit or red fine glitter from Martha Stewart.
She is layered on the new Spellbinder Nestabilities Beaded Ovals which I have embossed and stencilled using Ranger distress ink Antique Linen.  I have attached some sheer red ribbon to the oval and a Christmas stamp from PI Essential Christmas and Lady bug Memento ink.  The strip behind has been created with Martha Stewart edger punch New Scallop and AC textured red and white card (as is the card stock).  The beautiful embossed background paper is from the K & Co Winter Wonderland range.  Finally I have stitched around the edge and added some red bling, again K & Co.


It really is a Gorjuss day!  This little lady is Bumble Bee and again has been coloured with copics and MS glitter.  I have layered with my Spellbinder round and big scalloped  circles Nestabilities using K & Co Winter Wonderland papers and AC textured cream and white card.  I have used Martha Stewart edger punch Lace heart to create a strip behind all finished with white gel pen or black journalling pen.  Finally I have added green sheer ribbon from my stash and a wee bit of bling from K & Co. 
I was asked on the day how I got the outer edge of the card and I'm afraid I did it the old fashioned way...I rummaged in my kitchen till I found something spot on to draw around.

So guys that's it again for today....I'm thinking a fluttering of snow tomorrow!!!
Now I'm off to crack on with some more cards, birthday's and Wedding Anniversary's coming up in our family so better get off this machine and get cracking. 
Hope you find some time to craft today.  :)


Monday, October 04, 2010


Today I have two straight forward cards using the same stamps (PI  MM Christmas Wishes) but looking very different.  The black and white which is my favourite and a green and gold for those traditionalists out there...
The black and white card has been created using Spellbinder Nestabilities label 8 and black Archival ink with PI clear embossing powder.  I have finished with white ribbon from Papercraft's Boutique, black journalling pen and a bit of bling!
For the other card I have used cream and gold card stock, K & Co Winter Wonderland papers, PI gold embossing power, green gems and cream ribbon from my stash.  This card reminds me of cards I would have made in the early days, stamping and embossing then mat and layering...but loving this new tree, it is so shouting out to be embossed and kept simple.


The next card is a similar card to the one I created last week for Aberdeen also.  It is a shaker card and I have used the "Happy New Year" stamp from the PI clear set PA Large Christmas together with my Spellbinder Nestabilities round and big scalloped circles, acetate and K & Co Winter Wonderland papers inked with Ranger distress ink Weathered wood.  The white paper is again AC textured card stock.  I have used Martha Stewart Crystal coarse glitter, the bigger the better for shaker cards.  Finally I have added a gem from K & Co Christmas range and blue sheer ribbon from my stash.
I find that when layering up my shaker cards that 3D tape works the best as you have no little opening for the glitter to escape.

So that's me for today ladies, more tomorrow.  I'm away now to make some cards for friends and family. 
I also have my first challenge for the Sugarbowl to work on which I am really looking forwards to.
Happy crafting!!


Sunday, October 03, 2010


So firstly I would like to thank all the lovely ladies that came over to Papercraft's Boutique yesterday...what a great day I had...I hope you had fun also, enjoy your new toys!  :)

The first card I am going to show you is a Never ending card and I loved making this....it just goes on and on and well you've guessed it.....on!  I have linked above to the You tube instructions I used, thanks ladies for sharing and anyone in cyber land setting out to have a go enjoy.
I have used the fabulous new Personal Impressions Christmas stamps PA Large Christmas together with PI embossing powder pewter shimmer and Archival ink Jet black.  It is ages since I've done a lot of embossing work but really enjoyed dusting down my heat gun and playing again. 
It was stamping and embossing that first got me into card making a wee while ago now :)....when I lived in Edinburgh.  There was a great stamp shop just off Princess Street which had wall to wall stamps, it was fabulous.  Sadly it is no longer there but used to be a real treat to visit.
I have also used AC grey textured card and white card stock together with round and big scallop circles from Spellbinders Nestabilities, finishing with fine clear glitter and pearls.  I have kept the card simple as the delight is actually picking up the card and playing with the never ending aspect of it.....I challenge you to pick one of these cards up and put it down without having a play.....or maybe that's just me!


This next card also using the same PI stamps I took my inspiration from Littleprincesscards who has a fabulous blog with beautiful cards.  Take a trip over and marvel at her beautiful work.
I have used AC black and white textured card, my round nestabilities from Spellbinders, PI clear embossing powder and white ribbon from Papercraft's boutique.  I love the simplicity of this card....less is more as I was reminded yesterday!

Finally I would just like to say a big thank you to Gayle over on the Sugar Bowl for inviting me over to play with the lovely Sugar Bowl Sweeties!
I'm looking forwards to the challenge and getting out my Sugar Nellie stamps...time to play!!  Yippee!
Can't wait...... :)

Friday, October 01, 2010

So I'm ready for Elgin tomorrow I shall be at Papercrafts Boutique in Elgin from 10 till 4 p.m. 
Looking forwards to it, lots to show you but you'll have to wait till after the demo!  :0

Thursday, September 30, 2010

Morning crafters.  Firstly Susan I posted a link to the cracker template earlier in my posting.....however just for you click here and it will take you to the site, then just download and print the template and you're good to go, ENJOY!  Hope it doesn't drive you "crackers" LOL.

Now onto my final card from the Aberdeen demo.


This card was made using Spellbinder Nestabilities label 8 with white AC textured card, it was then mat and layered with Best Creations Inc Christmas time CT Merry Christmas, both sides.  The tree was made using Spellbinder Nestabilities Big scalloped circles large.  I used 3 circles starting with the largest then every other one.  The circles were scored from side to side at the internal scalloped point and then cut into the middle from the bottom.  I then pinched two sides together holding with red tape starting with the biggest circle then adding the smaller ones and working up.  I then glued to another label 8 base adding a trunk and pearls to decorate.  Finally adding some Rangers distress ink vintage photo, white gel pen stitching and a white satin bow.
This little tree seemed to be popular not only in Aberdeen but also in Elgin and does flatten to post but I'm afraid you'll still be charged large letter post so maybe not to send for everyone.  Or as I like to say "a special card for special people!"  LOL

So now onto today.....I am mostly going to be playing with snow!!!  Big hint of what might be coming up on Saturday!

Wednesday, September 29, 2010


Well we're nearly at the end of my demo samples for last weekend, just a few more to go.
Firstly I have used Spellbinder Nestabilities Star to create this Christmas decoration and AC textured card, ribbon, bell and jump ring from my craft stash and a wee bit of gold glitter.  I have used five stars in three sizes to create the 3d star but it would work equally as well with four.


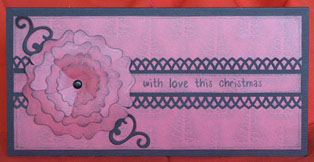
This card could be used for any occasion if you changed the background papers.  I have used black card stock and Best creations Inc Christmas time CT Snowman, reverse.  The flower has been made using Spellbinder Peony cut and inked with Ranger distress ink black soot attached together with a black brad.  The swirls behind the flower have been made cutting up Spellbinder Shapeabilities fancy tags (oval).  Finally the strip has been created with Martha Stewart Edger arched lattice punch and the greeting is from PI Christmas stamps MM Christmas wishes, finished as normally with black ink pen around the edge.


Finally today another Gorjuss girl "Sitting" coloured with my copic's.  This velum in pink burst and pink holly is from the Papeterie, again I was asked to incorporate with my designs together with pink and white AC textured card stock.  I have used the new Spellbinder Nestabilities beaded ovals and have embossed then stencilled it with Ranger distress ink spun sugar.  The flowers have been made using my Spellbinder Nestabilities scalloped circles...I have used 5 for each flower 1 large 2 small and scrunched them finally adding a brad.
The greeting is again from PI stamps MM Christmas wishes layered on Martha Stewart edger punch new scallop and I have added some pink brads around the edges with, guess what?  More black pen!!  Can you see the trend!  LOL.

That's it for another day here, final card for you tomorrow folk and I have to say it was the favourite of most of the folk.
Happy crafting....I'm off now to get out the glitter!

Tuesday, September 28, 2010


Morning....and another Gorjuss girl this time Little Star, and what could go better with her than the Star Spellbinder Nestabilities?!
For this easel card I have used white and green AC textured card together with Best Creation Inc 12" Christmas paper.  I have also used my Martha Stewart edger punch doily lace and white satin ribbon.  I have sanded some edges added a bit of bling and the "Christmas Cheer" words from PI Christmas Cheer stamps, then finally edged with black marker pen.


The next couple of cards are using PI stamps Christmas Santa Paws.  The above card is again using AC textured card in white and red.  The 12" paper is from Best Creations Inc Merry & Bright Mb multi strip.  I have used Spellbinders Nestabilities label 8 to mat and layer, copic's to colour and Ranger gloss accents.  Red eyelets and gold split rings have been used to make the sign, from the stamp set also.  Finally I have again used black marker pen to highlight.


The above dog.....in his "dog house" is from the same stamp set as is the greeting but this time the card stock is "Holly" from the Papeterie, which I was asked to incorporate into my demonstration.  I have also used red and green card stock from AC, the red had been made into a roof using Martha Stewart edge punch new scallop and glittered with MS gingerbread glitter set.  The green at the base has just been folders, which seems to be quite popular just now.
The wee dog is coloured again with copic's, and glitter and glossy accents have also been added....finally you've guessed it I have highlighted with black ink.

So guys that's it for another day....off now to get ready for my upcoming demo in Elgin.

Monday, September 27, 2010


Another day and another card from the weekend.
This card is very simple, I've let the beautiful glittery paper do the talking from Best Creations Inc CT Snowflake.  I have used AC textured card stock and layered a rectangle of snowflake paper edged with Versamagic chalk ink sea breeze.  I then used my Spellbinder Nestabilities round and big scalloped circles large to create a shaker topper also using a further circle of the snowflake paper, acetate and a frame combining the circle and scallop circle.  I then have layers up the sandwich with a roll of 3d foam adding glitter from Martha Stewart Gingerbread selection.  Finally added a small bow of burgundy ribbon, a jem on the snowflake from K & Co and edged with black ink and white gel pens.


Onto another Gorjuss stamp "flower girl", I have coloured her with my copic's and highlighted with white gel pen and pearls.  I have again made a frame using my Spellbinder Nestabilities circles and big scalloped circles using snowflake paper supplied by the Papeterie and edged with black ink, I have attaches a snowflake metal embellishment with some white sheer ribbon.  The background paper is again from Best Creations Inc Fx Taboganing and has beautifully glittered trees.  I have created a strip across the top with Martha Stewart punch lace heart and a further strip of FX Taboganing paper as well as two tabs in grey AC textured card and snowflake paper, corner rounded and topped with a pearl.  The stamp "Happy Christmas" is from PI Christmas Cheer.  The card is then mat and layers with grey and white AC textured card stock, finished with white gel pen and black ink.
The coordinating Christmas cracker template was from Waltzingmousestamps, with many thanks to the guys over there for letting me use it.  I have used the paper from the Papeterie Snowflake, sheer ribbon and grey AC card with my Martha Stewart lace heart around the bottom.  The rectangles of Best Creations Taboganing papers were created using Nestabilities long classic rectangles large with a stamp "Noel" from the PI Christmas cheer set finished off with pearls and black marker pen.

Phew, that's me for another day...I'm off now to my local craft shop to coordinate this coming Saturday's demo at Papercraft's Boutique "The House of Sugar" .
Before I go I'd just like to say a big "thank you" to all the girls who came to my Hopeman crop yesterday afternoon for fun, giggles, crafting and cake.  I had a great afternoon in great company, looking forwards to the next one on the 31st of October, cackle, cackle and don't forget the challenge.....create something on a Halloween theme. 
BOO!!

Sunday, September 26, 2010

Morning crafters!!
Firstly I want to say a big thank you to Charlotte and all the guys over at the The Papeterie in Aberdeen for a great day yesterday and for providing loads of tea and biscuits.  I would also like to thank all the lovely ladies who took the time to come and visit and chat with me about crafting....enjoy all your new toys! 
I had a lovely day with lots of giggles and plenty of crafting.  :)
It was also great to meet Kate Ganson who actually designed the art work for the first card I'm going to show you.  I love this stamp from the new PI range Christmas cheer. 


I love the simplicity of this card (I like to include some easy to make cards in my demo for folk new to crafting), sometimes less is more!  Especially at Christmas when we've got so many cards to make.
The card was cut out using Spellbinders Nestabilities Long classic rectangle, as was the frame around Mrs Christmas and her pud.  It was layered with a green American craft textured card using  Nestabilities Long classic scalloped rectangle and 3d foam.  The stamp "Christmas cheer" was from the same pack of stamps inked with black stazon.  It is then layered with the new range of papers from Best Creation Inc. ST Snowman and AC white textured card stock.  I also used Vintage photo Ranger distress ink as a stencil with my rectangle to create a vintage look, my copic pens to colour and white gel pen to highlight then finished with some Martha Stewart glitter and black ink to edge.


On to my next card...and to Sugar Nellie Gorjuss girl Party Princess and the new Spellbinder Nestabilities label fifteen.   I love the Gorjuss girl stamps which are FAB to colour and so cute....now PI distribute them!  Yaah!
The papers again are the new Christmas range from Best Creation Inc. CT Tree dot....the detail is so perfect and glittery is would be a crime to cut up too much (I think a few of the ladies winced as I cut into them yesterday!!)
...you know when paper is too good to use...we all have that pile of stash that is for stroking only, lol!
Weird but very true.  :)
Anyway I have used a square card folded in the middle for a change and have used AC textured cream and white card to layer.  Inside I have continued the colour and added a greeting...but the papers are so glittery and perfect the only other embellishment is a bit of bling from the Papeterie in the corners...
Loving this new Nestie labels fifteen, it just layers beautifully...me thinks this will be getting lots of use in my craft room!
Finally I have coloured again using my copic pens, inked with Ranger distress ink vintage photo (my present favourite) and then highlighted with white gel pen and black ink.

That's me for today I'm now away to get sorted for today's Hopeman crop....more crafting, what a fab weekend I'm having!
More cards for you tomorrow and happy crafting!


Thursday, September 23, 2010

To all my fella blogger's and crafter's out there in cyber land I have some catching up to do with all your news...I can't believe how much I've missed by leaving my computer off and crafting this last week!!
I hope to catch up soon. x
All my work is now done and ready for my day in Aberdeen at the Papeterie this Saturday....want a sneaky peek?!!!
All will be revealed soon.  :)

Wednesday, September 15, 2010


So guys what do you journal?
I always have great intentions but usually have cards to make, orders to do or demo's.  I seem to get less and less of scrapbooking and journalling done about my family and friends unless of course if I am making a gift for someone.
Mind you I tend to also sit down on my puter or to watch the TV when really I should take myself to the office and play.  :)
Anyway, I was in TK Max this week and saw this blank book. 
Now we all are guilty of saying I won't buy it as I can make one....which if very true, but I have come to the decision that if I wait till I've make the book.......it could be sometime....and then I would have forgotten what I wanted to write!  LOL.
So I took the plunge and bought this book which I thought was very apt for my caravan journal....sad I know but my other half said it would be nice (note because it is a job for me!) to keep a record of sites and what we get up to whilst travelling around the country.


So my journal is made....and I only had to do a topper, using my Spellbinder nestabilities labels 8 and my cricuit machine.  The lettering was taken out of a magazine and finished with Ranger Glossy accents.
The journalling has been done with stamps from Papertrey Ink.
How easy was that!  I have also decided to keep it very simple....that way I might keep it up!


It is also already filled with our latest journeys....definitely a first for me. 
But the real question is "Will I keep it up?!!!"
My brother bought me a travel printer for Christmas so I can print and go....actually just had a good play with it and it is fabby....even though it took me a wee while to work out....not very techno minded!
So really now I have no excuse all I need is my camera, printer, pen, book and a couple of stamps..my way of getting in some crafting whilst on the go....well, it would be rude not to!

Friday, September 10, 2010


Now this really is the final post today!
In amongst the Christmas goody bag from K & Company there were pages of boxes and decorations enough to keep you going for this year and next.  So here are a few I made up.  :)
We did a few more on the day but I'm sure the ladies who bought the pack will be busy right up till Christmas.

What's next?
My next date to demo is Saturday 25th September at the Papeterie in Aberdeen.
Meantime "happy crafting!"
So ladies today is my final post from demo day in Elgin and today I'm going to show what was probably the most popular decoration of the day and I will give you  link to the instructions which were sent to me by my boss Jan, thank you.
 

This snowflake was made using Spellbinders Pendant Shapeabilities Fleurs De Lis, an old ribbon reel, K & Company papers and Christmas cheer adhesive gems and pearls and satin white ribbon from Papercrafts Boutique.
The pendant requires two large and two small pendants for each side and is scored and folded then attached together see the tutorial link I have added.  Thanks to Beckie for a fabby idea. x  You can check out her fabulous blog here.

Thursday, September 09, 2010

So I'm interrupting my samples again for a wee coffee break.....and whilst having a break I made another egg box so I thought I'd share it.  I have used K & Company Cuddly friends baby range, pink and white card stock, my cricuit and buttons from Dress it up.


And inside:


Simple but effective.  I also used some pink chalk ink and my new buttons from Epiphany Crafts in which you can back with matching paper which I've then threaded white ribbon through.
I'm loving these new buttons and tools....I am so going to need more!!
Let's hope the recipient likes it too.  :)


Another day another demo card.   Most of the items on this card were in the K & Company Christmas pack except the use of the Martha Steward lace heart...so that's the card, paper, tag, rub on. glitter chipboard letters and ribbon all in one pack...Christmas done and dusted!  If only it was that simple, lol.  Still it's a start....!


The same with this card too everything from the K & Company kit....I have used Spellbinders Nestabilities 8 to mat and layer and the tree was made using 3 sizes of Nestabilities Big Scalloped circles SM.  The circles were scored after each scallop right to the opposite diagonal, then I cut into the circle to the middle only and folded in and out...reminded me of fan making as a child!  :)
Once done I opened up and then glued 2 scallops together to give it tree branches all around.  For the second and third piece I scored the same and folded but when it came to gluing I attached it to the bigger circle already folded....make sense?!  Just make sure you glue on the folds so you get the overlap tree shape...I used red tape so it was instant. 
Bling was added from the kit too then a wee bit of Rangers distress ink vintage photo.

Wednesday, September 08, 2010

Right back to demo items.....


This little chap is from Personal Impressions Christmas set 1 (Clear stamps A6) and for those of you who are not keen on too much colouring in or got lots of cards to make this Christmas...he is the man for you as you only have the hat and scarf to colour. (I have used my copic pens then I have added some clear glitter and a wee bit of Rangers Glossy Accents.)
The papers and rub on are from the K & Company Christmas pack and the ribbon and snowflake charm from my stash.  I have used the corner punch from Martha Stewart "loops" on white America craft paper (also the card) then cut in between the loops to make them proud.  Finally I have edged with black marker.


Now with this card I wanted to do something a bit different rather than the usual Christmas colours and I have heard on the grapevine the "black" will be big this year.....we will see but here's my attempt.
The bauble is from the same Christmas set 1 from PI.  I have used Spellbinders Nestabilities labels 8 (1/2 of) and Shapeabilities Fancy tags and Martha Stewart edger punch new scallop.  The paper, rub on, bling and ribbon are all from the K & Company Christmas kit.  Finally I have edged using Ranger Black soot distress ink and a black marker.

Two more cards down....more tomorrow.
 I've got another birthday card and a New Home card to make for this weekend....I think I might play before cracking on with the housework which is SO boring in comparison!

Tuesday, September 07, 2010


Today it was Sarah's birthday so I dashed home and got crafting....she made me such a beautiful card for my birthday I wanted to return the favour.  I am taking a break from showing you my demo items to show you her card.
Now in true crafting form I wondered if there was a challenge anywhere that I could incorporate, kill two birds with one stone, so to speak, hope you don't mind Sarah.  :)
Over on the Sugarbowl challenge blog  they've set a challenge to join the Sugar Bowl so I thought I'd have a go.  There is a sketch to follow and a few requirements so why not have a go?
I have used K & Company papers from Classic K Bailey and brown craft together with Spellbinder Nestabilities label 1 and 8 and Martha Stewart doily lace.  I found some matching flowers by Prima, lace, wire, ribbon and cotton from stash.  I have edged with chalk inks brown and creamy beige and black ink.  The "Best Wishes" stamp is by Funstamps and the little tag and stamp from Stamping up.  The Sugar Nellie stamp is Gorjuss sitting and is coloured using copics pens.  Finally I have used my winnings from Epiphany Crafts to make 3 matching buttons.....oh I so loved playing with that new toy!! x
So before I go it's a final HAPPY BIRTHDAY to Sarah hope you've had a cracking day...and happy crafting to you all.


Another day and another card...again using the Nitwit range.  The background is AC textured red card then strips of Joyful hearts plaid and holly.  The strip along the bottom is Joyful hearts "hearts" finished using the Martha Stewart punch lace heart and the greeting is a K & Company rub on.  The Snowman is from the Joyful Hearts decoupage sheet as is the snowflake.  I have finished with some Christmas gems again from K & Company a wee bit of Rangers distress ink Vintage Photo and my black journalling pen.


For the above card I have combined the Nitwit range with the range of goodies from the Special value K & Company Christmas pack.  I have put two of the cards together to start again with adding Joyful hearts papers plaid and holly.  The plaid having been edged with Martha Stewart punch lace.  The JH pink spots paper has been cut using my scalloped circles nestabilities and the Ho, ho, ho chipboard shapes are from the K & Company pack.  The stamped images are the Nitwits Deer friends range including the "Merry Christmas" and have been coloured using my copics pens finished with glitter and Ranger Glossy accents.  I love the simplicity of this card and the stamped images are so cute.
When it comes to making Christmas cards I think it is fair to say when you've got so many to make it is always nice to have a couple of quick and easy cards up our sleeves.

Anyway that's all from me for today, I'm away to crack on with some more crafting, just found out it is a crafty friends birthday today.....you kept that quiet....you know who you are!!!  
When you made me such a beautiful card for my birthday too.  Very naughty!
 

Monday, September 06, 2010

So guys what to show you next...that is the question?
Got lots from the demo at the House of Sugar over the weekend to show you this week so please bear with me and to anyone who had joined my from the Sugar Nellie link thanks for taking time out to visit.  I'll be updating daily this week so feel free to come back and I'd love to hear any feedback you may have.
Today I think I will show you more from the Nitwit range of papers, did I mention I love them, sorry got you yawning already?!  I think of them as being quite American in style, got quite a folkie, primitive style to them and remind me of clip art that I used when I started making cards a wee while ago!
Back to todays card....

This card was made with American craft cream textured card and I have used the Deer friends Nitwit papers Blue bulbs, Diamond red and Stripes.   Rudolph (as I have named him) and the holly are from the Deer friends topper sheet too, so how easy does that make your card?! 
It is a T slide card and instructions can be found here, with many thanks to the guys over on Splitcoaststampers for all their inspiration.
The Spellbinder nestabilities I have used is labels 3.  I have also used glossy accents on the light bulbs and Rudolph's nose and eyes.  The whole card has been edged using Ranger distress ink vintage photo, outlined with black pen and the greeting was a rub on from the K & Company special deal of the day.
As you pull the tag on the right hand side the front of the card lifts and reveals, whatever you want it too, I have a further greeting on mine from the topper sheet also mounted on a cream oval from my nestabilies, as shown here:


This card was great fun to make.  More tomorrow, happy crafting and thanks for stopping by.  :)